TL; DR
Creating a Net Promoter Score (NPS) survey involves several key steps:
- Choose a survey tool: Select a robust platform like Survicate to streamline the design, distribution, and analysis of your NPS survey.
- Select a distribution channel: Decide whether to distribute your survey via email, website, or mobile, based on your target audience's preferences.
- Customize the survey: Utilize templates and adjust questions, survey logic, and design elements to align with your brand identity. Set parameters such as respondent identification, response limits, and survey availability to ensure effective data collection.
- Integrate with other tools: Connect your survey with tools like Mailchimp or Slack to enhance functionality and automate processes.
- Distribute the survey: Deploy your survey through the chosen channels, embedding questions directly into emails or websites to increase response rates.
- Analyze results: Use built-in analytics to interpret responses, calculate your NPS by subtracting the percentage of detractors from promoters, and identify areas for improvement.
Following these steps will help you effectively measure customer loyalty and gather actionable insights through your NPS survey.
What is the NPS survey question?
An NPS survey can help you measure customer loyalty and predict company growth. This customer satisfaction survey yields high response rates thanks to its simplicity and customer-centric approach.
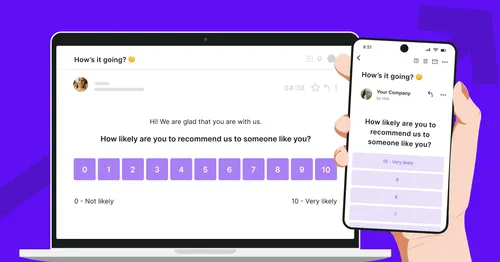
The Net Promoter Score (NPS) is one of customer satisfaction metrics measured with the following question:
“How likely are you to recommend us to someone like you?”
The NPS question is usually followed by an open-ended one that allows respondents to expand on their rating. Have a look at our template to see how it works.
In this blog post, I’ll walk you through taking the first steps of measuring your customer satisfaction with the most popular survey type in customer and market research - the NPS survey.
How to create an NPS survey?
First, choose an excellent customer satisfaction tool. This will make the design, distribution, and analysis much more efficient.
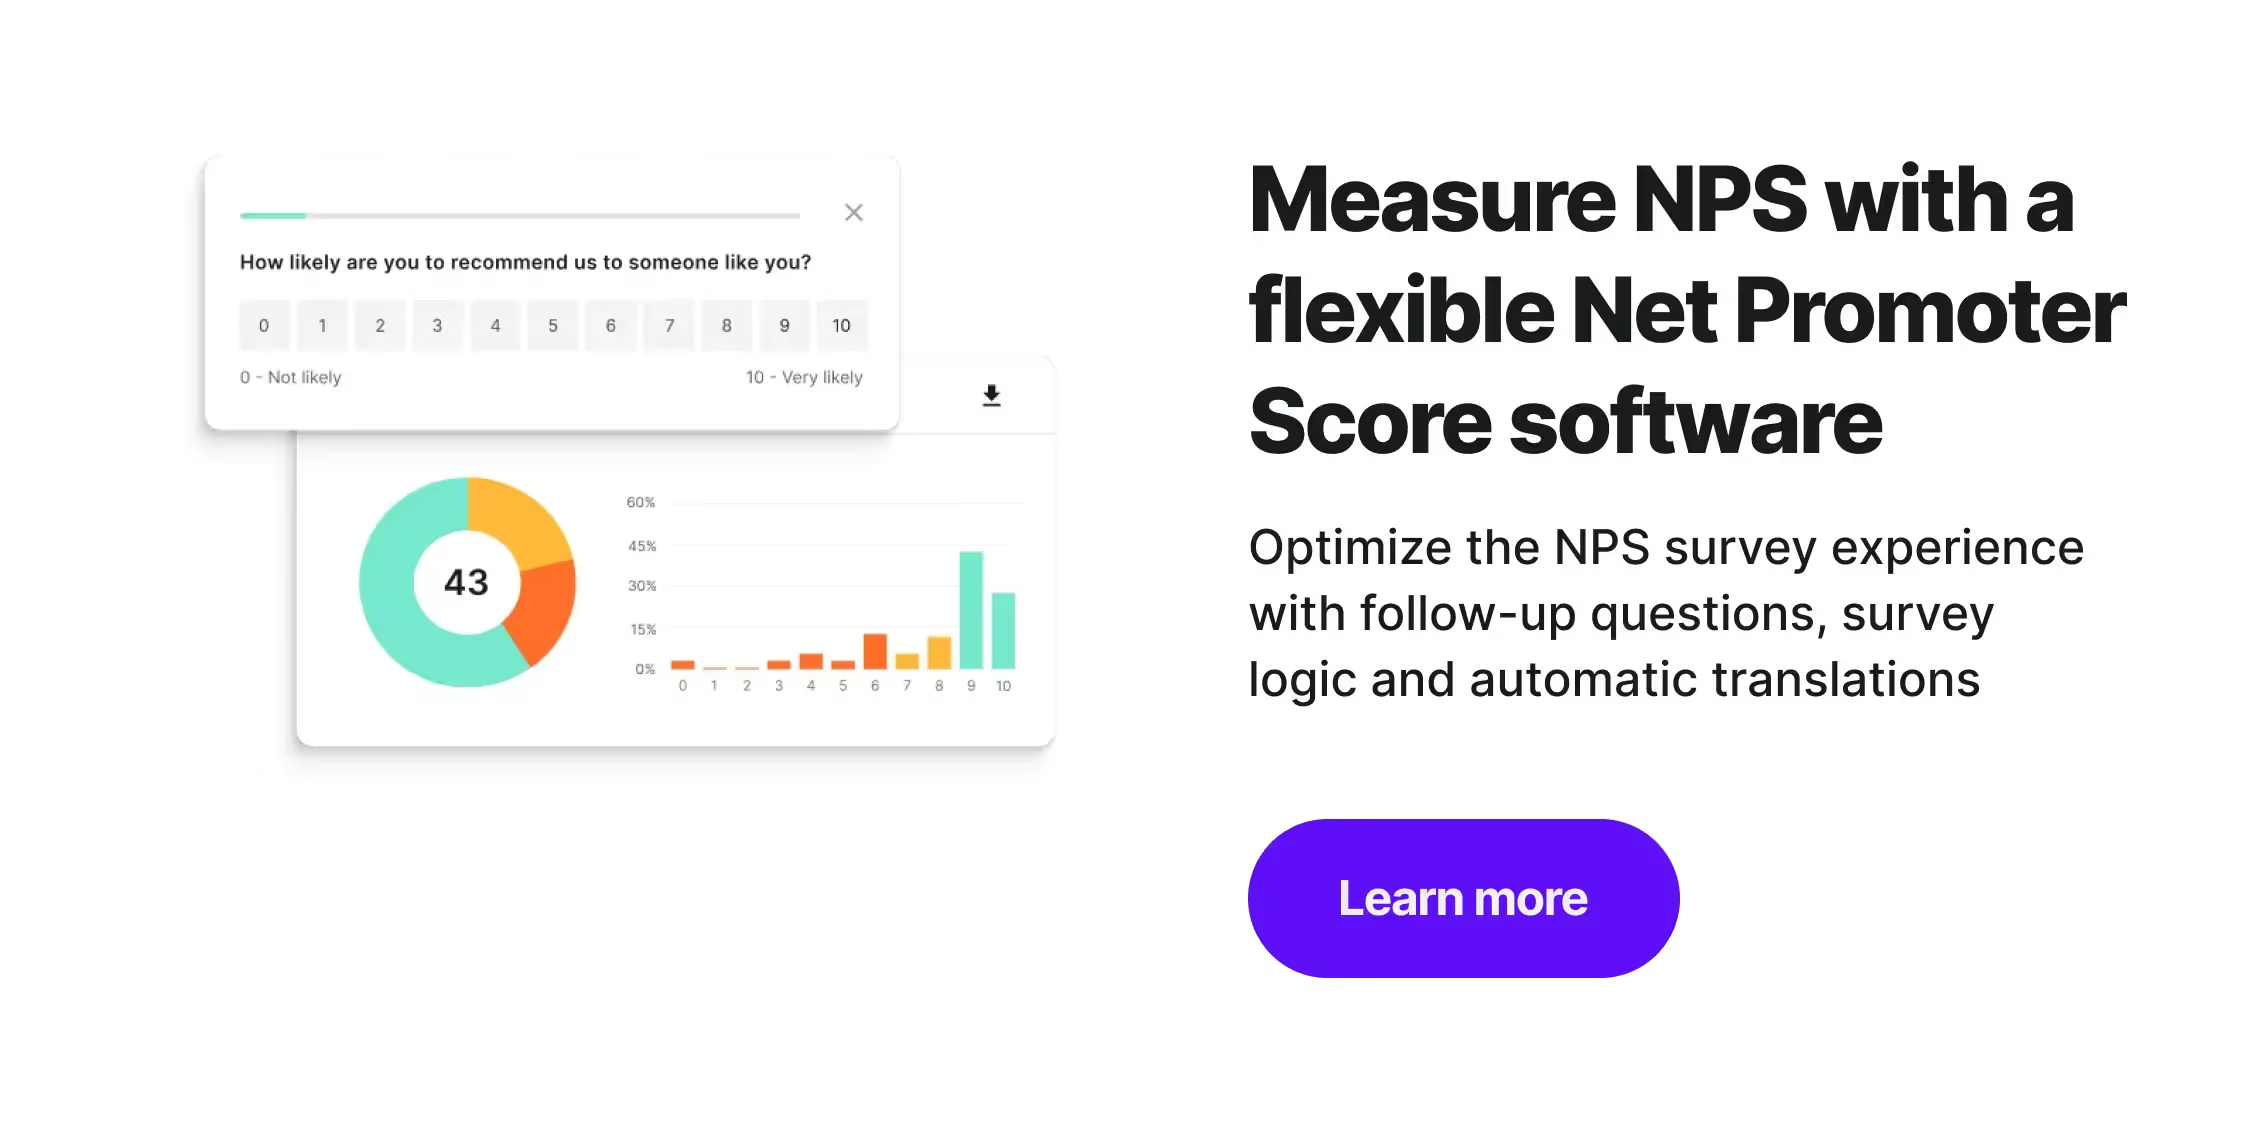
When you sign up for Survicate, you can have your survey ready for your customers in a matter of minutes. The whole process happens inside our convenient dashboard, from choosing a template to analyzing your results.
Let’s go through the process of launching and conducting an NPS campaign.
1. Set up a free Survicate account
Head over to our website or straight to the signup page. You can provide your information or use a Google account. You’ll be able to start editing your NPS template the moment you sign up.
Survicate integrates with dozens of third-party tools, including Mailchimp, allowing you to automate the survey experience.
2. Choose a distribution channel to go straight to the NPS survey template

You may decide to start from scratch. Choose to distribute your survey via email, website, or mobile. You don’t need to code anything. The Survicate dashboard offers five tabs to fine-tune your survey.

But it’s best to start with a template. Survicate offers over 125 of them, optimized for the highest response rates and contextual feedback.
3. Modify the NPS template if needed
After you click on the NPS survey template in our library, you can
- edit or add questions
- modify the survey logic
- use an existing theme or create your own
- customize the appearance of the survey to fit your brand
- and more
All within the first “create” tab.
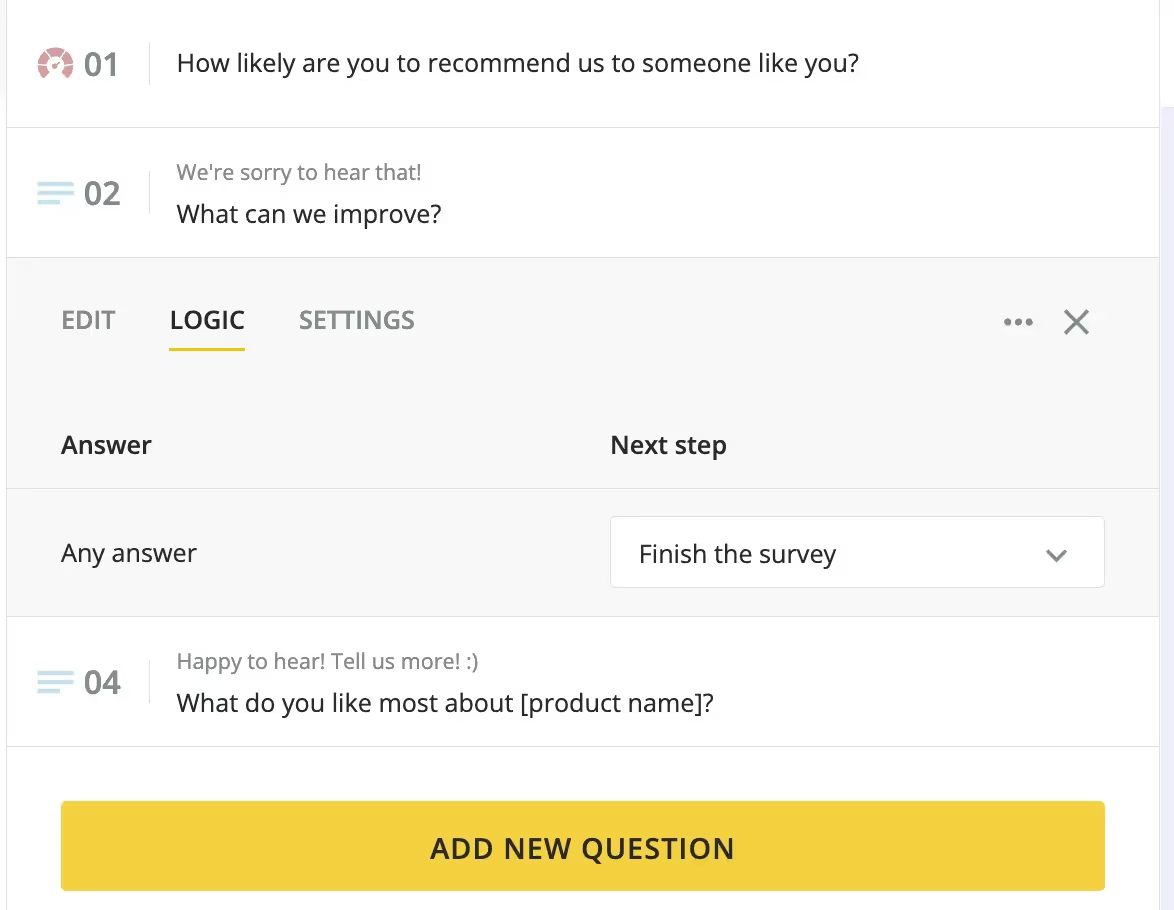
You can set up survey logic. This way, promoters, passives, and detractors will always receive an appropriate next question or response. The “analyze” tab will also sort their answers accordingly, so it’s easier to interpret the results.
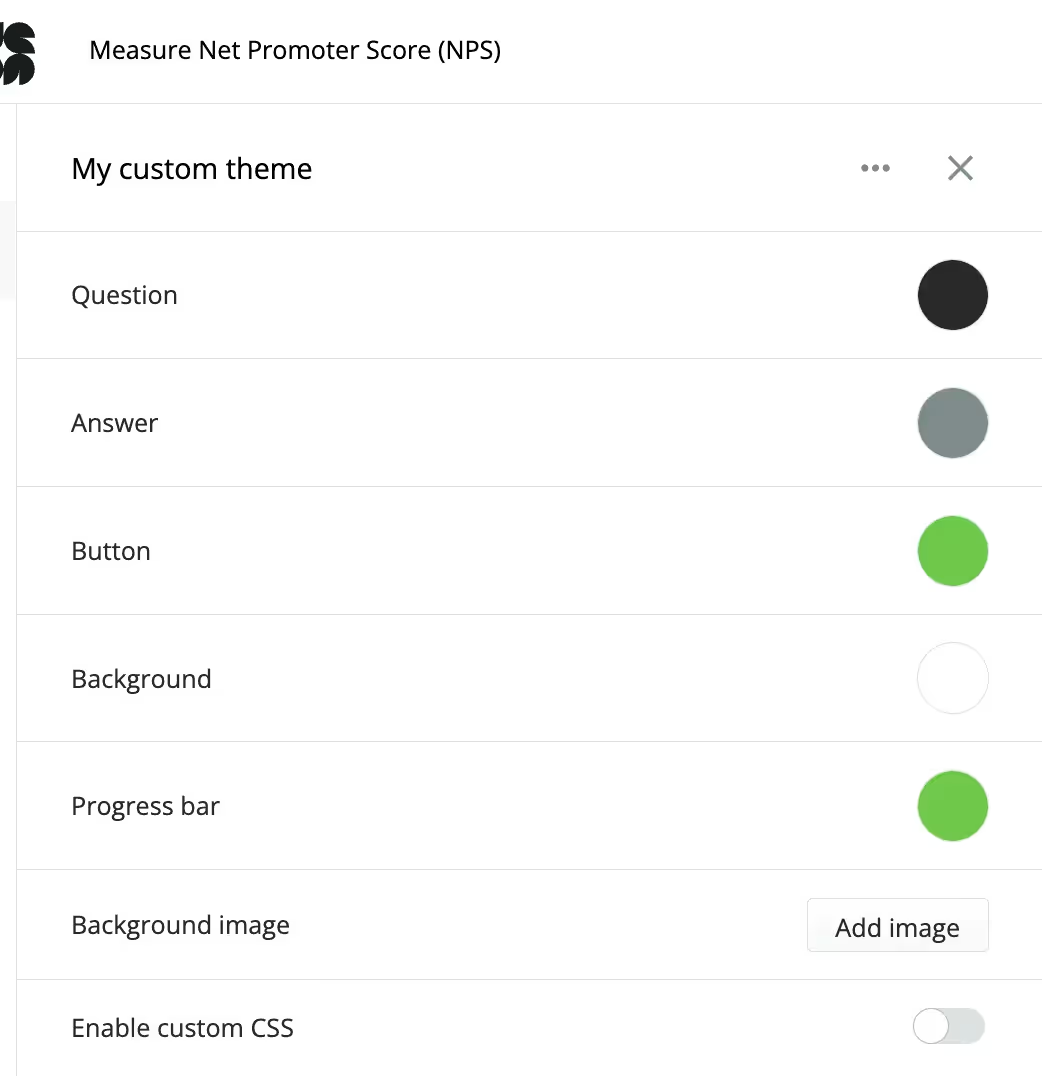
Moreover, Survicate offers advanced customization beyond fonts and buttons - you can create your theme that will be available for future survey campaigns. Use the Unsplash library to create a professional look.
One of our recent product updates also made it possible to serve your customers with a survey in their preferred language. Survicate multilingual surveys allow you to run one campaign in more than one language at a time. Your customers will see the language chosen in their browser settings.
4. Configure your NPS survey
After you are done with the microcopy and appearance of your survey, you’ll be able to configure the output. In the configure tab, you have the options to
- Set up respondent identification
- Decide whether your respondents will be able to retake your survey
- Enable or disable your survey
- Set a response limit
- Set up an end date for your NPS survey
5. Connect with your favorite tools
The connect tab is centered around Survicate integrations. At the moment, 23 of them are native, one-click integrations.
Use them to
- Bring your analysis to the next level (e.g., Survicate x Mixpanel)
- Get notified about the most recent responses (e.g., Survicate x Slack)
- Supplement data collection with heatmaps and session recordings (e.g., Smartlook)
- And more
Of course, there are many more benefits to integrating Survicate with your favorite tools, including advanced respondent identification. This mechanism will help you contextualize feedback and close the feedback loop.
6. Distribute your NPS survey
You can run multi-channel NPS surveys with Survicate. The distribution options include email, website, app, and Intercom messenger.
The “share” tab will provide a link to test your survey and an HTML code. Paste the code into your email service provider such as Mailchimp to show the first NPS question inside the email body when you connect with your customer.
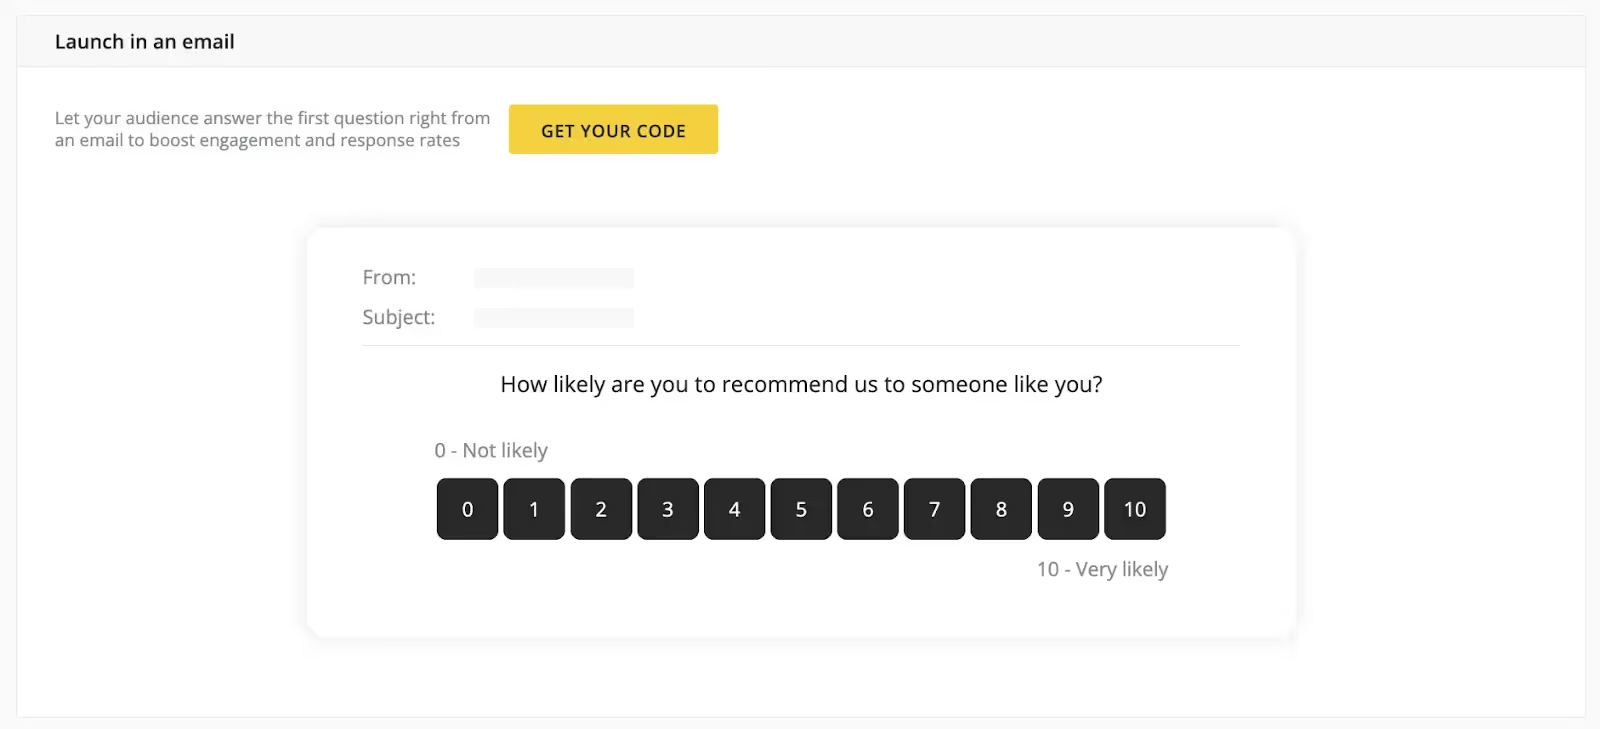
Embedding the first survey question in the body of the email is a great way to boost response rate.
7. Analyze NPS results
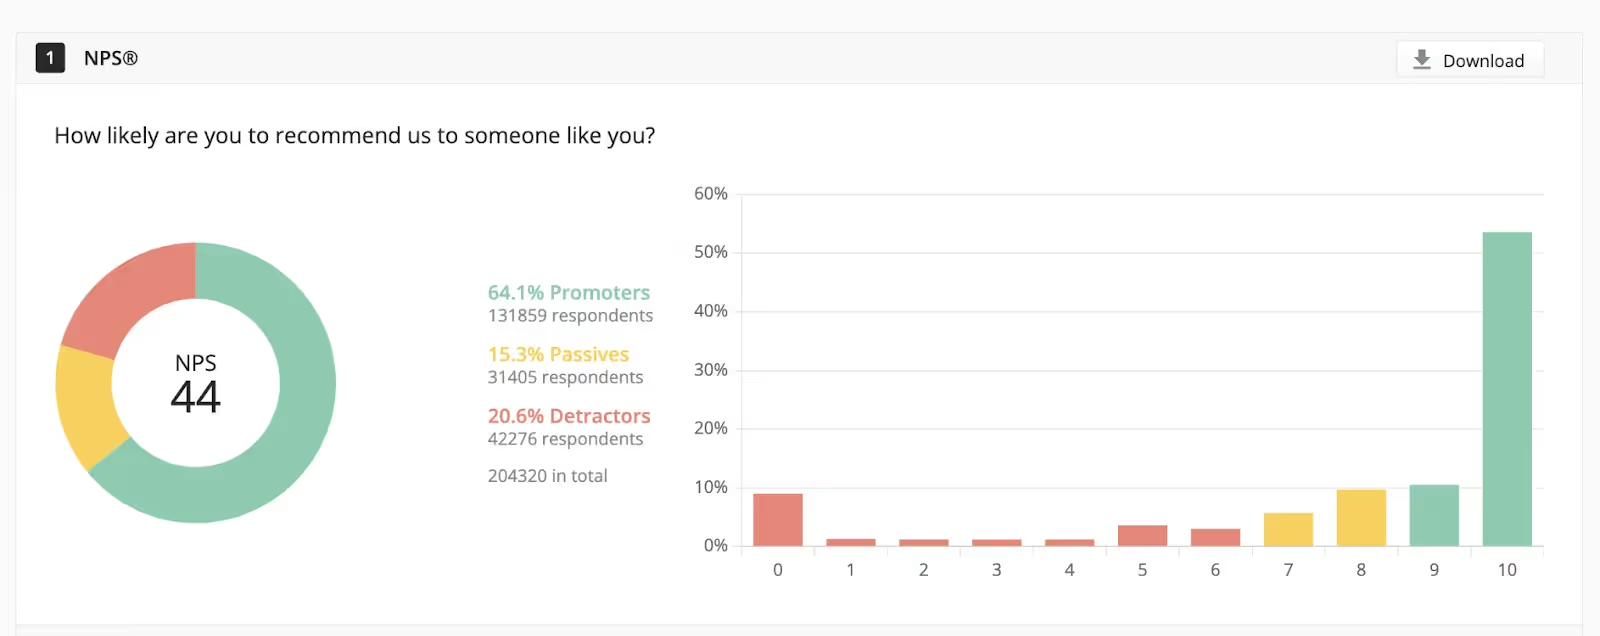
NPS analysis can be made easy with Survicate. In real-time, you’ll get information such as
- The total number of responses
- The date of the last response
- The total view count of your survey
- And more
But most importantly, Survicate has a built-in NPS calculator. A visual report will appear in your “analyze” tab, showing your Net Promoter Score and distribution.
How to calculate your NPS score?
The formula for calculating your net promoter score is as follows:
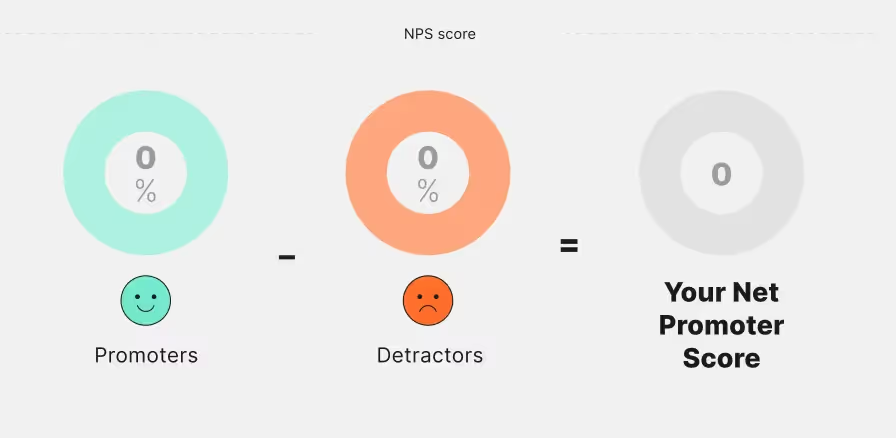
Promoters are respondents who gave your ratings of 9 or 10. They are loyal customers and prospects of brand advocates.
Passives are those who rated their loyalty at 7 or 8. These scores are disregarded when calculating the NPS. Nonetheless, following up with those on the verge of churning or becoming promoters is a good idea.
Detractors are those who rated their loyalty at 0 to 6. You can count these customers as unsatisfied. They may even spread bad word of mouth, so it’s a good idea to reach out to them and find out whether their bad experience is something you can fix.
You can also supplement your NPS campaign with a Customer Effort Score survey to nail down where the issues lie with closed-ended, contextual questions.
Creating NPS surveys: Best practices
Designing a great NPS survey isn’t just about asking the famous question—it’s about creating an experience that encourages honest feedback and provides you with insights to help your business grow. Here are some practical tips to keep in mind.
Keep it simple
The beauty of an NPS survey is its simplicity. Stick to the main question, “How likely are you to recommend us to a friend or colleague?” Keep additional open-ended questions optional and concise—something like, “What’s the main reason for your score?” This keeps things short and sweet while still giving you valuable feedback.
Pick the right moment
Timing is everything. Send your survey when the customer’s experience is fresh in their mind—right after a purchase, a support interaction, or when they’ve had enough time to use your product. This way, you’ll capture feedback that’s authentic and relevant.
Know your audience
Not all customers are the same, and their experiences may differ. Think about sending separate surveys to different groups, like new customers, long-term users, or people in specific regions. Tailoring your approach can help you uncover patterns and solve specific issues.
Make It easy to respond
Don’t make customers hunt for your survey. Embed it in an email, a website popup, or even in your app. The easier it is for them to respond, the more likely they are to share their thoughts with you.
Be transparent
Let customers know why you’re asking for their feedback and how you’ll use it. Respect their privacy and be clear about how their data will be handled—it builds trust and encourages openness.
Do something with the feedback
An NPS survey is only as good as what you do with the results, so close the feedback loop by acting upon it. Look beyond the numbers—pay attention to the comments and group them into themes. Address problems that detractors highlight, keep neutral customers engaged, and celebrate what promoters love about your brand. Sharing these insights across your team can spark real change.
Create your NPS survey with Survicate
Now that you know how to design, distribute, and analyze an NPS survey, it’s time to take action! With Survicate, you have all the resources you need to create seamless surveys that deliver insightful customer feedback on one platform. Whether you’re looking to boost customer satisfaction, improve retention, or simply understand your audience better, an NPS survey is a powerful step in the right direction.
Ready to get started? Sign up for a free Survicate account and enjoy a 10-day trial of our Best plan today.



.svg)

.svg)


